| use arrows to turn the pages. |
The Polygon tool allows you to move any corner any way you want, and add corners by Shift-clicking on a line (and delete corners by Ctrl-clicking a node). Note there are two sets of handles with this tool – the inner handles directly move the mask corners, varying the length of the two sides as needed while the outer handles shift the mask maintaining the relative lengths of the two sides nearest the handle. There is also a center handle that shifts the whole mask without changing its shape.
In this image, the nonrectangular shape is slight, but more extreme geometries with straight edges can easily be fit with this tool. When the polygon (or whichever geometrical tool-shape you’ve used) fits the way you want, click the Apply button in the lower left corner to make a mask . . .
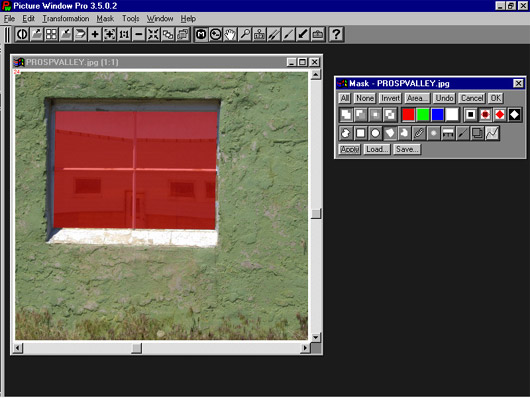
Note the mask can be shown as a transparent or solid color over the image (red, green, blue or white), turned off, or only the mask can be shown in B&W (using the appropriate two buttons on the right side of the Mask window, directly below the Area and Undo buttons). You can “undo” the last mask step and add additional sections using any of the mask tools until the mask is complete. When the mask is ready, clicking the OK button at the upper right of the mask window will create a new image window with only the mask. This can be saved as a file, or used temporarily with its associated image file. In addition, you can directly use the mask above with various Picture Window Pro tools and functions, but saving it first is a good idea in case you want to make different modifications to the same image in the future . . .
| use arrows to turn the pages. |