|
The clouds near the center have more “pop”, but we’ve
lost the darker areas, the grasses look dull, the almost white flowers have
been “blown out” to totally white, and we have a harsh, unpleasant
image overall. Obviously just increasing the contrast is not the answer.
In my darkroom days, I might have approached this by “burning in”
the cloud area while leaving the rest of the picture alone. In B&W printing,
I might have even combined the use of “masks” with variable-contrast
paper and increased the contrast of the central cloud area. This would have
required two “masks”, usually cut out of opaque paper, one
to expose the clouds and shield the rest of the image, another to shield
the clouds and expose everything else. It was a very tedious and slow process,
and it was impossible to reproduce the same effect twice.
With Picture Window Pro, masks are extremely versatile. They can be as
precise as a pixel, or can be soft and blurry. They enable you to control
about any quality of an image: brightness, contrast, saturation, color-balance,
sharpness, blurring, etc. Moreover, you can save the results digitally
to use as many times as you want.
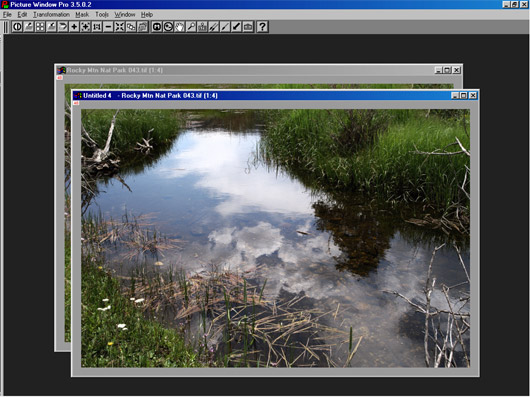
In this case, the first thing we need to do is select the water portion
of this image precisely from the surrounding grasses. There are several
ways to do this. The resulting mask image should have one “polarity” of
the mask (black or white) coincident with the water surface and the other
(white or black) covering all the surrounding area. I choose to use the
Picture Window Pro Paint function in the Mask tool set. This is the best
tool for precisely creating a mask on an image with fine details.
|