| |
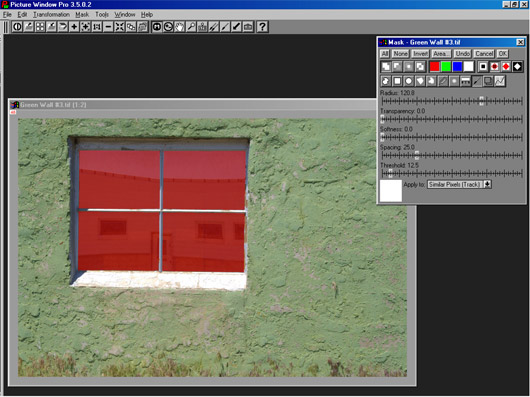
In this case, I painted only the window panes, leaving the wood crosspieces
unmasked. Actually, I also used the Invert button (third from left of the
top row of Mask controls) and a smaller Threshold setting to clean up the
crosspieces in the window. Note that when using the Paint tool the mask
color appears immediately . . . you don’t need to click an “Apply”
button (in fact, there is no Apply button, but a larger window appears with
Radius, Transparency, Softness, Tracking and Threshold controls). And to
really get a precise mask, you can switch between the Paint tool and any
of the geometric drawing tools as much as you like, even changing the Add
button to a Subtract button if you need to trim away mask areas. When the
mask is the way you want it you need to click OK to create the mask image
window (or, as mentioned above, you can directly use the mask just created
. . . but it’s wise to save your masks until you are sure you don’t
need them again).
|
|