Good question. This topic probably deserves a separate document with some detailed examples, but here is a brief summary of the techniques I regularly use.
To answer your second question first, increasing saturation before converting to B&W could be helpful as it increases the separation between the color channels, but everything else works more or less the same in B&W or color.
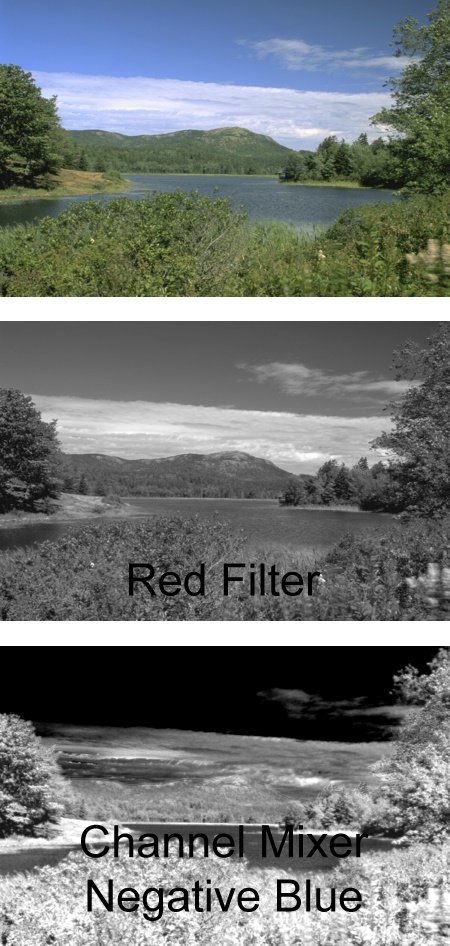
To exaggerate the differences between different colors when converting to B&W, I use either the Channel Mixer or the Hue Curve method. When using the channel mixer, you can get effects beyond what you can get by just applying a color filter to the image since it allows for negative slider values. For example:

- B&W1 v1.jpg (102.48 KiB) Viewed 48665 times
Similarly, using the Hue Curve method, you can selectively lighten or darken different colors in the input image by dragging the curve up or down for the hues you want to affect. Just be aware that these techniques and generally anything else that increases contrast will also amplify noise.
Once you have a B&W image to use as a starting point, the next thing to try is the Brightness Curve transformation to make some tonal adjustments. While you can apply curves to the entire image, often the best result comes from creating a mask for some area you want to work on and then applying different curves to the masked and unmasked areas. The easiest way to create the mask is to use the Freehand Outline mask tool to make a rough selection and then to blur the mask using the Mask Blur tool so the effects will be applied smoothly. Next click the Histogram button at the top of the Brightness Curve transformation to display the histograms of just the masked or unmasked areas.

- B&W2 v1.jpg (1.66 KiB) Viewed 48665 times
Then when you click the white or black curve buttons you will see the histogram of the masked or unmasked areas and can modify curves separately for each. You can click and drag on the input image to see what part of the curve corresponds to its brightness levels. To increase contrast in that area, add control points to the curve and make the slope steeper. To make an area brighter, raise the curve -- to darken it lower the curve.
Finally, once you have made your local brightness and contrast adjustments, you can increase the local contrast for all or part of the image using the Multipass Sharpen transformation. Generally, just adjust the Blur Threshold -- increasing it makes the effect stronger.
Lastly, as with color images, you might need to do some cloning to touch up problem areas and cropping to fine tune the framing.